
Polystyrene cube moulds play a crucial role in construction quality testing. Grout is more than just a filler; it’s a critical component that holds structures together and ensures long-term stability in construction. When we need to test this essential material, we rely on specialized tools designed specifically for creating standardized samples.
In this comprehensive guide, we’ll explore everything you need to know about polystyrene cube moulds, including the popular polystyrene cube moulds 100mm size that many professionals prefer. These lightweight, practical solutions are ideal for quick, on-site testing where convenience is essential. Additionally, their single-use design eliminates the need for cleaning, making them a time-efficient choice for busy construction teams.
Throughout this article, we’ll share our expert insights on selecting the right mold for your specific needs, proper testing techniques, and how to ensure your test results are consistent and accurate. Whether you’re new to construction testing or looking to optimize your current methods, this guide will help you master the use of polystyrene cube moulds for perfect testing results every time.
What Are Polystyrene Cube Moulds?
Expanded polystyrene (EPS) cube molds are specialized testing containers designed for creating standardized samples of concrete, grout, and other cementitious materials. These lightweight, single-use molds have become an essential tool in the construction and civil engineering industries.
Definition and purpose
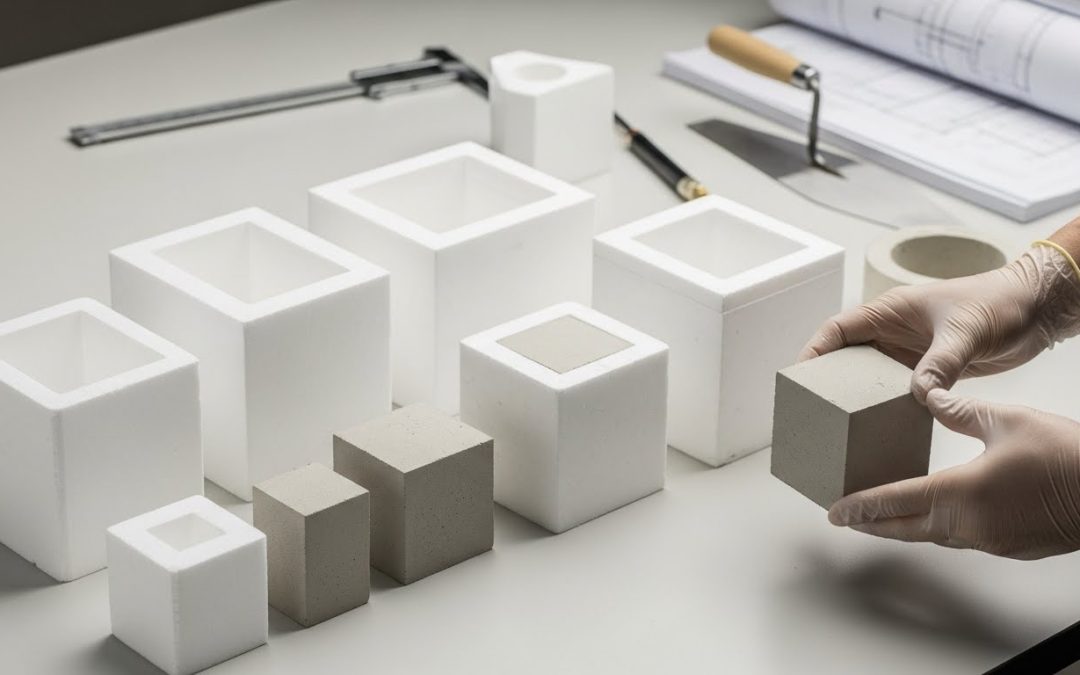
Polystyrene cube moulds are precisely formed containers made from high-quality expanded polystyrene foam, engineered specifically for creating consistent sample cubes for compressive strength testing. These disposable molds are pre-formed to exact dimensions (typically 50mm, 75mm, or 100mm cubes) to ensure compliance with standard testing procedures. Their primary purpose is to provide a reliable, standardized method for assessing the strength and quality of concrete and cementitious materials on construction sites and in laboratories.
Unlike permanent testing equipment, these molds serve as both the forming container and protective casing during the crucial initial curing period. Once the sample has cured, the mold is broken away to retrieve the hardened cube for testing.
How they differ from steel molds
The most significant difference between polystyrene and traditional steel molds lies in their usage approach. While steel molds are designed for repeated use, polystyrene molds are single-use only. Furthermore, polystyrene molds eliminate the need for mold release agents and reduce cross-contamination risks, making them ideal when there’s no access to washing or reconditioning facilities.
Another notable distinction is weight – polystyrene molds are substantially lighter, making them easier to transport and handle on-site. However, it’s important to note that according to some testing, polystyrene molds may not fully comply with relevant standards for high-precision testing.
Why they are used in construction testing
Polystyrene cube moulds have gained popularity in construction testing for several practical reasons. First, they offer a cost-effective solution for high-volume testing environments. Their lightweight design makes them particularly valuable for on-site testing where portability matters.
The insulative properties of polystyrene also provide unique benefits – they allow samples to cure and hydrate in a controlled environment, offering protection during the critical initial set period. This is especially important when testing materials like foamed concrete, where traditional steel molds might actually hinder accurate results.
Moreover, the polystyrene surface allows testers to write identification details, pour location, and date information directly on the mold, ensuring all critical data remains with the sample throughout the testing process.
Types and Sizes of Polystyrene Cube Moulds
Selecting the right size and type of polystyrene cube mold is essential for accurate testing results. These testing tools come in several standardized dimensions to accommodate various project requirements and testing protocols.
Standard sizes available
Polystyrene cube moulds primarily come in three standard dimensions: 50mm, 75mm, and 100mm. These precise measurements ensure uniformity across testing procedures and laboratories. In certain markets, 150mm molds are also available for specific applications.
Some manufacturers offer these molds in different configurations, including single-cavity designs and multi-gang versions. For instance, three-gang molds allow for casting multiple samples simultaneously. This variety gives testing professionals flexibility based on their specific needs.
Despite their lightweight construction, these molds are manufactured to meet industry standards. Many designs comply with various international testing protocols, although it’s worth noting that some testing indicates polystyrene molds may not fully satisfy all relevant standards.
Use cases for 50mm, 75mm, and 100mm molds
Each size of polystyrene mold serves distinct testing purposes:
- 50mm molds are ideal for educational settings and small-scale testing where material conservation is important
- 75mm molds offer a middle ground, suitable for medium-strength materials and projects with space constraints
- 100mm molds serve as the industry standard for most routine concrete and grout testing scenarios
The choice between these sizes typically depends on your specific application, the material being tested, and any relevant regional standards. In India, for example, while 150mm cubes are widely used, 100mm sizes are common for specific applications and educational testing.
When to choose polystyrene cube moulds 100mm
The 100mm cube mold has become the most widely used size for several practical reasons. First, these molds provide an optimal balance between sample size and material usage.
Generally, 100mm polystyrene cube moulds are the preferred choice when testing standard concrete mixes used in routine construction projects. They’re particularly effective for on-site testing where both accuracy and practicality matter. Many suppliers keep large quantities of 100mm molds in stock, enabling next-day delivery for urgent testing requirements.
In practice, 100mm molds offer sufficient volume for most aggregate sizes while remaining manageable for transportation and handling. For contractors and engineering firms conducting regular quality control testing, this size has consequently become the industry standard.
How to Use Polystyrene Cube Moulds for Accurate Testing
Properly executing concrete testing with polystyrene cube moulds requires precision at every stage. Following standardized procedures ensures your test results reflect the true properties of your materials.
Step 1: Preparing the mold
First, inspect your polystyrene cube mold for damage or irregularities. Unlike steel molds, polystyrene molds don’t need extensive cleaning but do require proper preparation. Apply a very thin coat of release agent to the interior surfaces just enough to leave a light fingerprint when touched. For multi-piece molds, seal the joints with a small amount of petroleum jelly or light cup grease to prevent moisture loss.
Step 2: Mixing and pouring grout
Mix your grout thoroughly according to project specifications. Once mixed, you must begin molding specimens within 2 minutes and 30 seconds of completing the mixing process. Pour the grout into the mold in two equal layers for 100mm molds or three layers for larger sizes. Ensure you have at least 1.5 times more material than the mold volume to allow for proper filling and finishing.
Step 3: Compacting and curing
For standard concrete, compact each layer with 25-32 tamping strokes using a tamping rod. However, foam concrete requires no compaction. After the final layer is compacted, level the surface flush with the top of the mold using a steel trowel. Cover the filled mold with the provided top cover or plastic sheeting to maintain constant humidity and temperature. Place in a vibration-free location at room temperature (approximately 21°C).
Step 4: Demoulding and testing
After an initial 24-hour curing period, carefully break the polystyrene mold to retrieve your specimen. Subsequently, place the sample in controlled conditions until the testing date. Many testing protocols require samples to be tested at both 28 and 90 days. Polystyrene molds are single-use only they must be broken during demoulding.
Common mistakes to avoid
Beginners often fail to properly seal multi-piece molds, leading to moisture loss that affects strength results. Furthermore, inadequate compaction creates air pockets that compromise test validity. Additionally, removing specimens too early or exposing them to temperature fluctuations during initial curing can dramatically alter results. Finally, inconsistent mixing ratios between batches makes comparative testing impossible.
Expert Tips for Better Test Results
Getting reliable test results requires attention to detail beyond basic procedures. These expert recommendations will help you maximize accuracy in your construction material testing.
Choose the right size for your application
Consider your specific testing needs when selecting mold dimensions. The 100mm polystyrene cube moulds are ideal for standard concrete testing, offering the perfect balance between sample size and material usage. For frequent testing, evaluate whether single-use polystyrene or reusable steel molds better suit your requirements.
Ensure proper curing conditions
Place freshly filled molds in a vibration-free environment at approximately 21°C. Cover samples with polythene sheeting or a damp cloth to maintain humidity. The polystyrene itself provides valuable insulation that protects the cell structure during the crucial initial set period. If transporting samples after initial curing, keep them moist throughout the journey.
Use consistent grout mix ratios
Maintain standardized mixing procedures between batches. Prior to filling molds, ensure your sample volume is at least 1.5 times larger than the mold capacity. This excess allows for proper compaction and finishing without material shortage.
Label and track samples correctly
Immediately after finishing the cubes, attach small paper tags with identification details. The polystyrene surface itself works well for writing cube identification, pour location, and date information ensuring all critical data remains with the sample.
Dispose of molds responsibly
Since polystyrene cube moulds are single-use, check with your local recycling facilities for proper disposal options. Many facilities accept clean polystyrene for recycling, reducing environmental impact.
Conclusion
Polystyrene cube moulds have undoubtedly revolutionized construction material testing through their convenience, consistency, and practicality. Throughout this guide, we’ve explored their fundamental purpose as standardized testing containers and the distinct advantages they offer over traditional steel alternatives. Their lightweight, single-use nature makes them particularly valuable for busy construction sites where portability and efficiency matter most.
After examining the various sizes available, the 100mm option stands out as the industry standard for routine testing, striking the perfect balance between sample size and material economy. The step-by-step procedures we’ve outlined will help you avoid common pitfalls that can compromise test accuracy.
Additionally, our expert tips regarding proper curing conditions, consistent mixing practices, and careful labeling will further enhance your testing precision. These seemingly small details ultimately determine whether your test results truly reflect the material properties of your construction components.
Therefore, whether you’re conducting quality assurance for a major infrastructure project or educational testing in a laboratory setting, polystyrene cube moulds offer significant advantages. Their insulative properties create ideal conditions for initial curing, while their disposable nature eliminates cleaning requirements and cross-contamination risks.
Though single-use by design, responsible disposal through recycling programs can minimize environmental impact. Overall, these specialized testing tools represent an essential component in modern construction quality control. We believe mastering their proper use, as outlined in this guide, will help you achieve consistent, reliable test results that ensure structural integrity and safety in your construction projects.
Recent Comments