
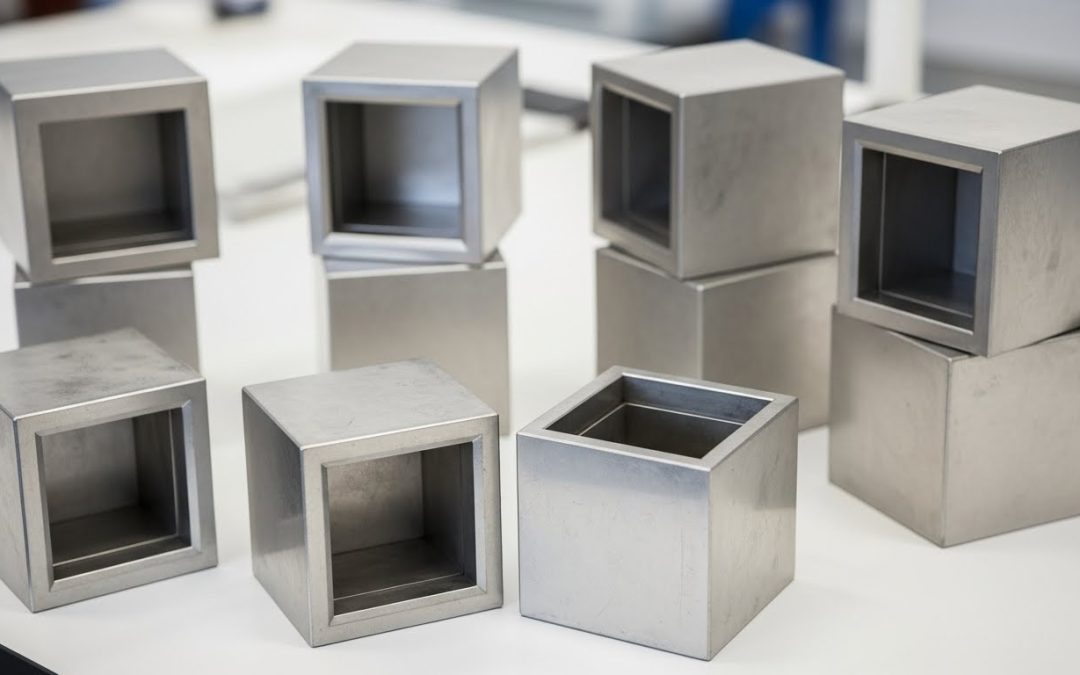
Are your concrete test results inconsistent despite following proper procedures? The problem might be with your 100mm cube moulds, which play a crucial role in obtaining accurate concrete strength assessments. These precision-engineered testing tools are manufactured from heavy gauge steel and designed to create two precise 100mm concrete test specimens simultaneously.
When properly maintained, 100mm cube moulds provide reliable data for construction quality control. However, even minor defects can significantly impact your testing accuracy. In fact, these cube moulds must meet specific standards including ASTM C31, C192, AASHTO T23, T126, BS-1881:108, and EN 12390-1 to ensure reliable results. Throughout this article, we’ll explore common issues with 100mm cube moulds, how to properly inspect them, and best practices to follow for accurate concrete testing.
Common reasons your 100mm cube mould may give wrong results
Testing accuracy depends greatly on the condition of your cube moulds. Based on extensive research, even minor issues with 100mm cube moulds can lead to significant variations in test results. Let’s examine the most common culprits.
Improper mould cleaning or residue buildup
What appears clean to the naked eye often isn’t at the microscopic level. Concrete particles and chemical residues cling to mould surfaces like “barnacles on a ship’s hull,” creating a rough surface that makes demolding progressively more difficult with each use. This invisible enemy accumulates over time, causing concrete to stick more aggressively.
Moreover, residual cement paste is highly alkaline and corrosive. If left on steel surfaces, it can lead to pitting, rust, and permanent distortion of the internal dimensions. For optimal results, cube moulds should be thoroughly cleaned, dried, and oiled immediately after use. This practice prevents hardened concrete buildup that could compromise future specimens.
Worn-out or deformed mould edges
Even high-quality moulds deteriorate with repeated use. Research shows that just 20 reuses can cause a 22% decrease in compressive strength results due to increased surface distortion. Additionally, studies comparing various mould conditions found that using the worst of the studied moulds led to an 18% reduction in measured compressive strength compared to the best ones.
The flatness tolerance for new moulds is 0.0003d (0.0003 times the mould’s size in mm), while for moulds in use, it increases to 0.0005d. As these tolerances are exceeded through wear and tear, test results become increasingly unreliable.
Incorrect assembly or loose fittings
Proper assembly is critical yet often overlooked. Moulds must be assembled securely with appropriate bolts or clamps, never with makeshift solutions like binding wires. All joints must be tight to prevent leakage, as any concrete seepage can harden in seams and joints, making future assembly problematic.
Furthermore, the restraining lid must be securely clamped to the mould during the curing process. Any looseness allows for uneven pressure distribution, resulting in specimens that don’t accurately represent the concrete’s true strength.
Use of non-compliant mould dimensions
Standards exist for a reason precision matters. Cube moulds must adhere to specific dimensional tolerances: ±0.2mm on internal dimensions, with a maximum flatness deviation of 0.03mm. The angle between adjacent faces must maintain 90° ± 0.5°.
For 150mm cubes, the tolerance should not exceed 0.5% (maximum 0.75mm) on the designated size of an assembled mould. If any dimension varies by more than 2% from the designated size, the sample must be rejected or adjusted.
These seemingly minor dimensional variations can drastically affect compression test results, leading to incorrect assessment of concrete quality and potentially serious construction issues.
How to inspect your 100mm cube mould for accuracy
Regular inspection of your 100mm cube mould is essential for maintaining testing accuracy. According to industry standards, verification should be performed annually or whenever you suspect the mould dimensions may be compromised.
Check internal dimensions with a caliper
Initially, use a digital vernier caliper readable to 0.01mm to measure internal dimensions. For 100mm cube moulds, the internal dimensions must be precisely 100.0 mm ± 0.1 mm. Take measurements in at least four places for each dimension to ensure consistency throughout. Remember that used moulds have slightly wider acceptable tolerances than new ones, but specimens from moulds with dimensions varying more than 2% from designated size must be rejected.
Inspect for rust, cracks, or warping
Prior to dimensional verification, thoroughly examine your mould for visible damage. Look specifically for signs of material warping, which can significantly alter test results. Residual cement paste is highly alkaline and corrosive if left on steel surfaces, it leads to pitting, rust, and permanent distortion. Consequently, any mould showing these signs should be immediately removed from service.
Verify flatness of base and sides
Subsequently, check the flatness of all internal surfaces using a 300mm straightedge and feeler gauges. Place the straightedge across each surface and attempt to insert feeler gauges of various thicknesses beneath it. For new moulds, maximum flatness deviation should not exceed 0.03mm, whereas used moulds can have up to 0.05mm deviation. This verification should be performed along multiple directions on each surface.
Ensure tightness of bolts and clamps
Lastly, inspect all fastening mechanisms. Loose bolts or improper assembly can create leakage paths and dimensional inaccuracy. Some laboratories utilize tension-indicating “smart bolts” that change color based on applied tension, eliminating guesswork in proper tightening. Regardless of method, ensure all components are marked with unique serial numbers before calibration and that clamps provide uniform pressure across all joints.
Standards your cube mould must comply with
To guarantee reliable test results, your 100mm cube moulds must adhere to internationally recognized standards. These specifications ensure consistency across testing laboratories worldwide, establishing clear benchmarks for acceptable dimensional tolerances and material requirements.
ASTM C192 and C39
ASTM C192 dictates protocols for making and curing concrete test specimens in laboratory settings. This standard meticulously outlines procedures for specimen preparation and curing to ensure consistency in testing. Meanwhile, ASTM C39 delineates steps for determining compressive strength of cylindrical specimens and is widely recognized globally. Together, these standards provide a comprehensive framework for concrete testing in ASTM-compliant environments.
BS 1881:108
This British Standard specifies procedures for making and testing concrete cubes. It ensures consistency and reliability in concrete testing practices, particularly within projects adhering to British standards. The standard requires moulds to maintain internal dimensions of 100 ± 0.15 mm with a flatness tolerance of 0.03 mm for new moulds. After multiple uses, these tolerances may increase to 0.06 mm.
EN 12390-1
The European standard outlines requirements for testing hardened concrete, covering procedures for compressive strength testing, specimen preparation, and result reporting. For 100mm cube moulds, EN 12390-1 mandates watertight, non-absorbent moulds made from materials that won’t distort during use. Notably, calibrated moulds must be made of steel or cast iron as reference materials.
AASHTO T23 and T126
Developed by the American State Highway and Transportation Officials, these standards are crucial for maintaining concrete quality in transportation projects. AASHTO T23 outlines methodology for fabricating and curing concrete test specimens, while T126 focuses on testing compressive strength of hardened concrete using cylindrical specimens. For initial curing, these standards require maintaining temperatures between 16-27°C (60-80°F).
Best practices to avoid testing errors
Proper testing procedures are equally important as mould quality for obtaining accurate results. Incorporating these essential practices will ensure your concrete specimens truly represent the material’s strength.
Use mould oil before pouring concrete
First thing to remember, always apply a thin layer of mould release agent to the interior surfaces of your 100mm cube mould. Avoid pooling or excess oil – a properly oiled mould should not leave residue on your finger when wiped across the surface. This thin coating prevents concrete from sticking and enables clean removal without damaging specimens.
Compact concrete properly in layers
For 100mm moulds, fill concrete in two equal layers. Each layer requires at least 25 strokes with a tamping rod to remove entrapped air without causing segregation. After tamping, tap the sides of the mould with a rubber mallet until large air bubbles cease to appear. This ensures uniform density throughout the specimen.
Cure specimens under controlled conditions
After filling, cover the mould with a damp cloth and polythene sheet. Store at room temperature (approximately 21°C) away from vibration and dehydration. This initial curing is crucial for proper strength development.
Demould only after recommended time
Remove specimens from moulds between 16-24 hours after casting. If concrete hasn’t achieved sufficient strength by this time, delay demoulding another 24 hours. Take care not to damage corners or edges during this process.
Label and store cubes correctly
Mark each cube with waterproof identification immediately after demoulding. Thereafter, place specimens in a curing tank with water temperature maintained at 27-30°C. Ensure adequate space between cubes for proper water circulation.
Conclusion
Accurate concrete testing stands as the cornerstone of structural safety and quality control. Throughout this article, we’ve explored how seemingly minor issues with 100mm cube moulds can significantly impact test results and potentially compromise construction integrity.
Regular inspection and maintenance of your cube moulds prove essential for reliable testing outcomes. Defects from improper cleaning, wear and tear, incorrect assembly, or dimensional non-compliance can lead to misleading strength assessments. These errors might cause construction teams to either overestimate concrete strength, creating safety risks, or underestimate it, resulting in unnecessary material costs.
Consequently, adherence to international standards such as ASTM, BS, EN, and AASHTO ensures your testing procedures meet global benchmarks for accuracy. These standards exist because precision matters deviations as small as 0.03mm can affect test results.
Additionally, following best practices for concrete specimen preparation, from proper oiling and compaction to controlled curing conditions, complements well-maintained equipment. Think of your testing process as a chain each link must remain strong to produce dependable results.
Ultimately, your commitment to mould inspection and maintenance directly influences construction quality and safety. A small investment of time checking dimensions, flatness, and hardware tightness pays enormous dividends through trustworthy test data. Remember concrete testing isn’t just about numbers; these results guide critical decisions affecting structural integrity and human safety.
Therefore, make mould inspection and maintenance a routine part of your quality control process. Your future structures will thank you with reliable performance and your testing program will yield the consistent, accurate results necessary for confident construction decisions.
Recent Comments